SAML authentication
Zulip supports using SAML authentication for single sign-on, both when
self-hosting or on the Zulip Cloud Plus plan.
This page documents details on how to set up SAML authentication with
Zulip with various common SAML identity providers.
- Make sure you have created your organization. We'll assume its URL is
https://<subdomain>.zulipchat.com in the instructions below.
- Set up SAML authentication by following
Okta's documentation.
Specify:
https://<subdomain>.zulipchat.com/complete/saml/ for the "Single sign on URL"`.https://zulip.com for the "Audience URI (SP Entity ID)".- Skip "Default RelayState".
- Skip "Name ID format".
- Set 'Email` for "Application username format".
- Provide "Attribute statements" of
email to user.email,
first_name to user.firstName, and last_name to user.lastName.
- Assign the appropriate accounts in the "Assignments" tab. These are the users
that will be able to log in to your Zulip organization.
- Send the following information to us at support@zulip.com:
- The URL of your zulipchat-hosted organization.
- The "Identity Provider metadata" provided by Okta for the application.
- The name "X" that will be displayed on the "Log in with X" button in Zulip.
- Optionally you can also send us an icon that should be shown on the button.
- We will take care of the server-side setup and let you know as soon as it's ready.
- Make sure you have created your organization. We'll assume its URL is
https://<subdomain>.zulipchat.com in the instructions below.
- Navigate to the OneLogin Applications page, and click "Add App".
- Search for the "SAML Test Connector (IdP w/ attr w/ sign response)" app and select it.
- Set a name and logo according to your preferences and click "Save". This doesn't affect anything in Zulip,
but will be shown on your OneLogin Applications page.
- Go to the "Configuration" section:
- Leave the
RelayState field empty.
- Set
https://zulip.com as the Audience.
- Set
https://<subdomain>.zulipchat.com/complete/saml/ as the Recipient, ACS URL
and ACS URL Validator.
-
Go to the "Parameters" section. Ignore the pre-configured parameters that are already there
and add custom ones to match the following screenshot:
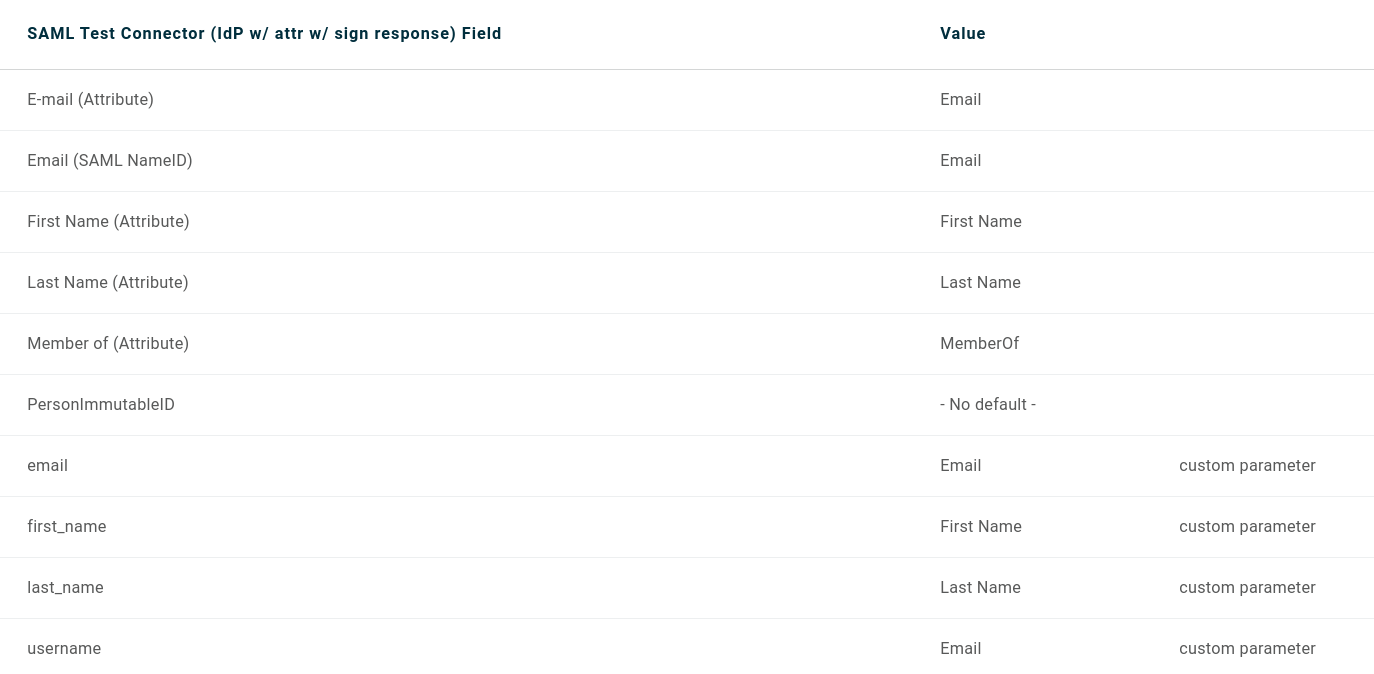
Make sure to set the "Include in SAML assertion" flag on them.
-
The OneLogin side of configuration should be ready!
Send the following information to us at support@zulip.com:
- The URL of your zulipchat-hosted organization.
- The issuer URL from the "SSO" section. It contains Identity Provider metadata that we will need.
- The name "X" that will be displayed on the "Log in with X" button in Zulip.
- Optionally you can also send us an icon that should be shown on the button.
- We will take care of the server-side setup and let you know as soon as it's ready.
Related articles